Why a Shoreline Is Never Just a Line on a Map
Learn to read a shoreline by its beaches, rocky edges, and inlets so you can spot changing footing, sheltered pockets, and exposed stretches as you go.
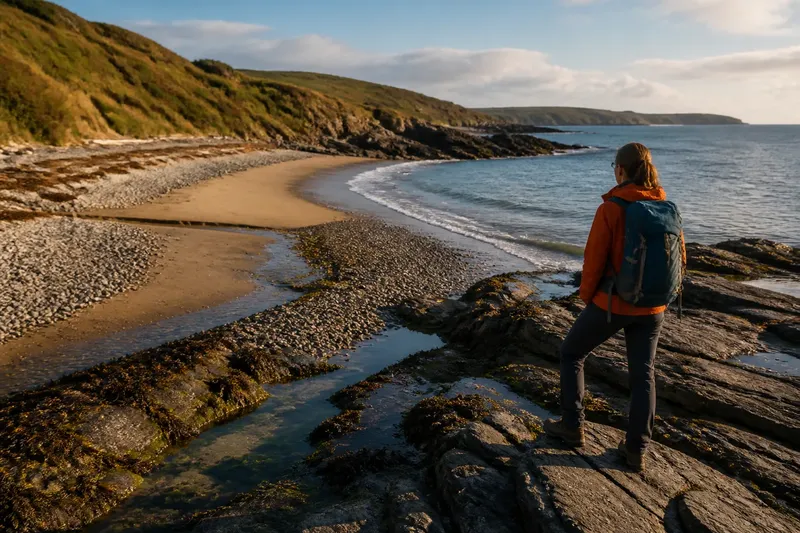
Why does the shoreline ahead look so different from the neat line on your map? Reading a shoreline means noticing where sand, stone, water, and shelter meet—and how those features change the route beneath your feet.
Read the shape before choosing your line
From a distance, a beach, headland, and inlet can seem like three marks along one route. On foot, each has its own texture. Sand may slope gently or rise in a short, steep face. A rocky edge may offer broad shelves or loose stones. An inlet may open into a sheltered pocket or narrow into a channel that feels different from the outer shore.
Start with the broad outline. A smooth curve may indicate a beach or broad bay. A point projecting into the water suggests a headland, where the shore turns and the wind, waves, and view may change. A notch between points may be an inlet or cove. Treat these as clues, not promises: tides, weather, and the seabed all affect what you encounter.
Then look for smaller transitions. A pale band of sand may meet darker stones. A low shelf may give way to a steep bank. Seaweed or driftwood can mark where waves have reached, though those lines shift. Ask not only, “What is this feature?” but also, “What changes when I reach it?”
Beach slope and material change the footing
Beaches are not all easy, flat corridors. Fine sand may feel forgiving, yet be soft enough to make each step demanding. Coarse gravel and rounded pebbles can roll or shift. A steep beach face can be tiring to cross, and the upper edge may be cluttered with driftwood, seaweed, or a small bank.
Look at the beach in sections. The lower shore may be smooth and firm where waves have recently passed, but waves can reach it unexpectedly. The upper shore may offer more room, though loose material can slow you down. There is no universally best line; the surface and the water’s reach matter together.
A stream crossing the beach may be shallow, or it may cut a channel through soft sand. Watch where it meets the sea: the outlet can shift, and wet sand around it may feel different from dry beach. If you cannot read the crossing, pause on stable ground and look for a clearer route rather than assuming the gap is firm.
Imagine you are walking toward a low headland and the beach narrows ahead. You notice a band of wet sand and a steeper gravel slope above it. You stop short of the pinch point, look for a broader section of upper beach, and check whether the headland can be passed at the current water level. That gives you a clearer choice about where to continue; it does not promise the route will remain open.
Rocky edges reward careful looking
“Rocky shore” can describe very different footing. Broad, flat slabs may invite a direct crossing, while broken blocks leave gaps and unstable surfaces. Small stones can skate under a boot; larger rocks may be slick with algae. A dark band near the water can be slippery even when the rock above it looks dry.
Notice the rock’s shape and connection. A continuous shelf may offer a clear route, but cracks or pools can interrupt it. A boulder field may look passable from a distance, then reveal uneven gaps. Look for a route where you can see your next foothold. If you cannot see where a step lands, slow down or stay on more predictable ground.
Tide pools tell you about the shape of the rock as well as the water they hold. Their rims may be slick, and a pool can hide its depth or bottom. Enjoy one from stable ground rather than treating it as a stepping stone.
Keep an eye on the transition between rock and sand. A narrow strip of pebbles at the base of a cliff may shift underfoot. A shelf that ends at a steep drop to the beach can make a short distance awkward. The transition often matters more than the name of either surface.
Inlets and coves have their own shape
An inlet bends inward, but the label alone does not tell you whether it is calm, shallow, or easy to leave. Its sides may shelter water from one direction and funnel wind or waves from another. A narrow opening can make the interior look quiet while water still moves through the entrance.
Look across the whole shape. Is the inlet wide and open, or narrow at the mouth? Does a stream enter at the back? Is one side a sandy curve and the other a steep rock face? Those details help you anticipate changes in footing and places where water may collect. A cove can be a pleasant pause, but it is not automatically a good place to linger if the shore is narrowing or water is rising.
Headlands change what you can see. A point may block the next bay, so you cannot assume the beach beyond it follows the same line. The outer side may feel more exposed than the sheltered side. Before committing to a turn, look at the land ahead and consider whether the route remains open at the water’s edge.
Colors and lines offer clues, not certainty. A line of kelp may trace recent wave reach; a pale patch may be sand, shell, or sunlit rock. The same surface can look different from another angle. Recheck as you move, especially where the shore bends or the light changes.
What can you do when a shore feature is hard to read?
How can you tell a beach from a gravel shore?
Look closely at the material and how it moves underfoot. Fine sand tends to form a continuous surface, while gravel and pebbles create a looser, uneven layer that may shift as you walk.
Why does a headland matter if the route stays beside the water?
A headland changes the direction of the shore and may alter exposure, visibility, and the available walking surface. It can also hide the next bay, so check the turn before assuming the route continues in the same way.
Does a calm-looking inlet mean the shore is easy to cross?
No. Water inside may look sheltered while the entrance has moving water, and the banks may be steep, muddy, rocky, or cut by a stream. Read the land on both sides as well as the water’s surface.
What should you do if you still cannot read the feature?
Pause on stable ground and observe the surface, waterline, and route toward the feature. If the next stretch remains hidden or the footing is uncertain, choose a clearer route or turn back rather than treating a guess as a plan.
Choose pauses with room to look
A useful stopping place is not only a scenic patch. It should give you room to stand clear of active water, see the route ahead, and avoid blocking a narrow passage. A broad, level section above the wet shore may be more comfortable than a sheltered-looking pocket at the bottom of a steep bank.
Use a pause to notice the next transition. From a beach, you may see the rocky point that will change your footing. From a point, you may spot a stream outlet or a narrowing bay. Choose a place where you can look without standing on loose stones or edging close to a wave-washed shelf.
What is not worth the effort? Trying to name every rock formation or infer the whole coastline from one view. Simple observations are more useful: the beach is narrowing, rocks are slick near the water, the inlet has a narrow mouth, or a point hides the next turn.
Keep shoreline reading practical
As you move, match each shape with a practical question: What is the surface? Where does it change? How much room is there between the shore and the water? Those answers can guide whether you keep walking, slow down, or pause to reassess.
On your next shoreline, use the map’s line as a broad outline and let the ground supply the detail. A beach, rocky edge, or inlet offers clues about footing, shelter, visibility, and where the route may pinch. Reading those clues helps you make a more informed choice when the shoreline ahead stops looking like a simple line on a map.